
Hydraulic Hose Crimping from Cut Length to Final Inspection
Dec 21st 2022
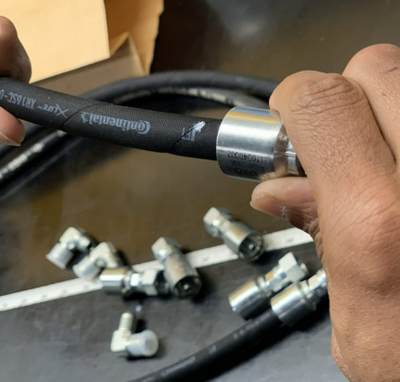
Crimping is the final forming step in a longer hose-assembly process. A crimper can close a ferrule to the programmed diameter, but it cannot correct the wrong hose, an incompatible stem, a poor cut, incomplete insertion, or contamination left in the bore. Reliable work begins with the current hose-and-fitting crimp specification.
Verify the assembly system before cutting
Identify hose manufacturer and series, size, pressure and temperature requirements, fluid, end connections, orientation, and finished length. Select the approved stem and ferrule or one-piece end listed for that hose. Material and plating should suit the media and external environment.
Crimp data should state the applicable machine or die basis, finished diameter, measurement location, tolerance, insertion depth, and any internal or external skive. Do not combine components from different systems because their dimensions appear close.
Prepare the crimper, saw or cutting equipment, measuring tools, insertion gauge, cleaning equipment, and required protective equipment before work starts. Machine guarding and manufacturer safety instructions control the operation.
Establish finished length and orientation
Assembly length is normally measured between defined points on the end fittings, not by adding hose cut length to visible fitting length. Stem insertion changes the relationship. Use the specified cut-length calculation and allowable tolerance.
For two elbows or angled ends, record angular orientation before assembly. A correct length with incorrect clocking can twist the hose when installed. Mark the hose and fittings in a way that remains visible through insertion and crimping.
Cut the hose square using equipment suitable for its reinforcement. A ragged or angled end can interfere with insertion and leave wire or rubber fragments. The acceptable squareness and preparation come from the assembly procedure rather than one universal degree limit.
Remove cutting contamination with an approved method
Cutting can leave rubber dust, wire particles, and abrasive residue inside the hose. Clean to the level required by the hydraulic system. Approved projectile cleaning, filtered air used under a controlled procedure, flushing, or another validated method may apply.
Do not introduce an unapproved pressure-washer fluid, solvent, lint, or moisture into the hose. Compressed air can create projectile and injection hazards and should be used only with suitable equipment and safety controls. Cap clean ends when assembly does not continue immediately.
Skive only when the exact design requires it
Some hose ends require external cover removal, internal tube removal, or both. Others are engineered as no-skive systems. Use the specified tool, diameter, and length. Cutting too deep can damage reinforcement; leaving excess material can prevent the fitting from reaching its designed position.
After skiving, remove loose wire and rubber and inspect the reinforcement. Do not use a wire brush, knife, or improvised method unless it is part of the approved process.
Insert the stem without damaging the hose
Place the correct ferrule first when using a two-piece end, then insert the stem to the marked depth. One-piece ends follow the same principle but arrive with ferrule and stem together. Use the insertion method and lubricant permitted by the manufacturer.
Hammering a fitting into place can damage the stem, hose tube, or sealing surfaces and should not be treated as a default method. If insertion is unusually difficult, stop and recheck component identity, preparation, and lubrication instructions.
The depth mark should remain at the expected position. Movement away from that mark during crimping can indicate that the hose backed out.
Crimp and measure the finished ferrule
Install the specified die set and machine setting. Center the ferrule at the correct position and keep hands outside the danger zone. Complete the cycle according to the crimper instructions.
Measure finished diameter at the location and orientation defined by the crimp data, commonly between die impressions rather than on a raised ridge. Check more than one position when the procedure requires it. A caliper must be suitable and calibrated; technique should not compress or tilt the measurement.
If the result is outside tolerance, do not repeatedly crimp the assembly unless the specification explicitly provides a correction procedure. Over-crimping can damage reinforcement, stem, or hose bore.
Inspect, clean, and document
Confirm length, orientation, insertion, crimp diameter, fitting alignment, and condition of the ferrule and hose. Look for cracked plating, split ferrules, exposed or displaced wire, cover damage, and contamination. Verify threads and sealing faces remained protected.
Complete any specified proof test, cleanliness step, labeling, and capping. Record hose, fitting, ferrule, crimp-data revision, finished measurement, date, and assembler when traceability is required.
The crimper supplies force; the process supplies correctness. Component matching, preparation, cleanliness, insertion, measurement, and final inspection are what turn the formed ferrule into a controlled hydraulic hose assembly.