
Connect Hydraulic Fittings Through Identification, Assembly, and Cleanliness Gates
Oct 26th 2023
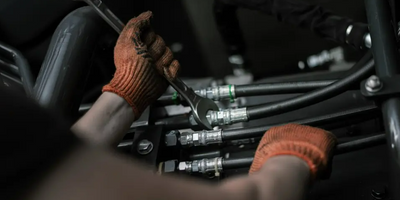
A hydraulic connection should pass several gates before pressure is applied. First identify both interfaces, then confirm the hose or tube and end system, control assembly dimensions, protect cleanliness, and complete the required inspection or test. Skipping an early gate cannot be repaired with extra torque at the end.
Gate 1: identify where the connection seals
Record each end as a complete standard and seal, not only as male or female. NPT tapered threads normally seal through controlled thread engagement and approved sealant. BSP can be parallel or tapered and may seal at a washer, O-ring, cone, face, or thread. JIC uses a 37-degree flare, ORFS seals at an O-ring face, ORB seals at a boss port, and metric fittings include several distinct geometries.
Use calipers, thread pitch and profile gauges, seat-angle tools, drawings, and the mating component. An NPT 60-degree thread form and a BSP 55-degree form can appear close. A part starting by hand does not establish compatibility.
Inspect threads, flare seats, O-ring grooves, spotfaces, washers, and cones for damage. If identity or condition remains uncertain, stop rather than using sealant to make an unknown combination hold.
Gate 2: choose a qualified line and end system
For hose, document inside diameter, working and surge pressure, temperature, fluid, cover environment, bend radius, movement, and applicable construction standard. Confirm the exact stem and ferrule or field-attachable fitting approved for that hose and dash size.
Permanent crimp, swage, and field-attachable systems use different parts, tools, and instructions. They are not alternative ways to install one generic fitting. Obtain the current manufacturer’s assembly data, including any skive requirement, insertion depth, tooling, and inspection limits.
For tube or pipe, confirm outside diameter or nominal size, wall, material, preparation, fitting system, and support. Do not use a hose assembly process to infer tube-joint requirements.
Gate 3: control finished length and orientation
Distinguish hose cut length from overall assembly length. The measurement points can be the end of a fitting, seat, flange face, or centerline depending on the connection. Short high-pressure assemblies may have narrow tolerances, and an error can force the hose into tension or a bend below its limit.
Mark angular orientation between elbows or bent ends before permanent attachment. Allow for hose movement under pressure and the equipment’s full travel. Use the layline as one indication of twist during routing, but do not rely on it to identify an unknown hose specification.
Cut hose square using equipment suitable for its reinforcement. Inspect the bore and cover, then remove cutting debris by the specified cleaning process. A clean-looking exterior does not prove that particles are absent inside.
Gate 4: assemble with controlled tooling
For a crimped assembly, verify hose, stem, ferrule, die, machine setting, insertion mark, orientation, and target crimp dimension before operation. Lubricate only where and with what the instructions permit. Seat the fitting to the marked depth and keep hands clear of the machine’s closing area.
After crimping, measure at the required locations and compare with the current specification. Check for uneven crimp, cracked or displaced ferrule, exposed wire, pinched hose, incorrect insertion, or damaged sealing surfaces. A machine bottoming on a die does not by itself prove the result is within tolerance.
Field-attachable or swaged connections need their own documented steps and measurements. Never reuse a permanent crimp ferrule or improvise a combination of hose and ends from unrelated systems.
Gate 5: protect cleanliness through delivery
Clean the completed assembly to the level required by the hydraulic system. High-value valves, pumps, servo components, and small passages can be damaged by manufacturing and cutting debris. If particle verification or a cleanliness certificate is required, state the method and acceptance level before production.
Cap both ends with clean protective closures promptly. Use packaging that prevents caps from being knocked off and keeps moisture, metal chips, and shop dirt away from the assembly. Label part number, length, ends, date or lot, and other traceability requested by the equipment owner.
Gate 6: inspect, install, and test under a safe procedure
Before installation, compare the assembly with the work order and inspect the machine ports. Route without twist, excessive bend, abrasion, heat exposure, or side load. Tighten each connection by the product and equipment instructions; torque and turns depend on standard, size, material, coating, seal, and port.
Proof, leakage, flushing, or functional testing should follow the governing hose program and application requirement. Isolate people from a pressurized test and never use a hand to search for a hydraulic pinhole. Stored energy must be controlled before correction.
Save the assembly data and any test record so a later replacement can be reproduced. These gates turn connection work from a set of familiar motions into a traceable process: the correct interfaces meet, the qualified line is retained properly, the internal surface stays clean, and the installed assembly is verified before service.